Tools required:
Small Flat head screw driver
- 2.5mm Hex wrench or ball driver.
Before beginning this procedure, please ensure that the filament is unloaded, print head is cool, and your DeltaMaker has been shut-down using the recommended shut-down and power-off procedure. If you are having trouble unloading the filament, it is safe to pull the filament guide tube up, and clip the filament at the print head.
If your print head has a black DeltaMaker logo on the back, it is a new-style, modular print head.
This print head style can have the wire harness removed from it, facilitating easy removal if needed for repair.
DeltaMaker Print Head Removal (New Style, Modular)
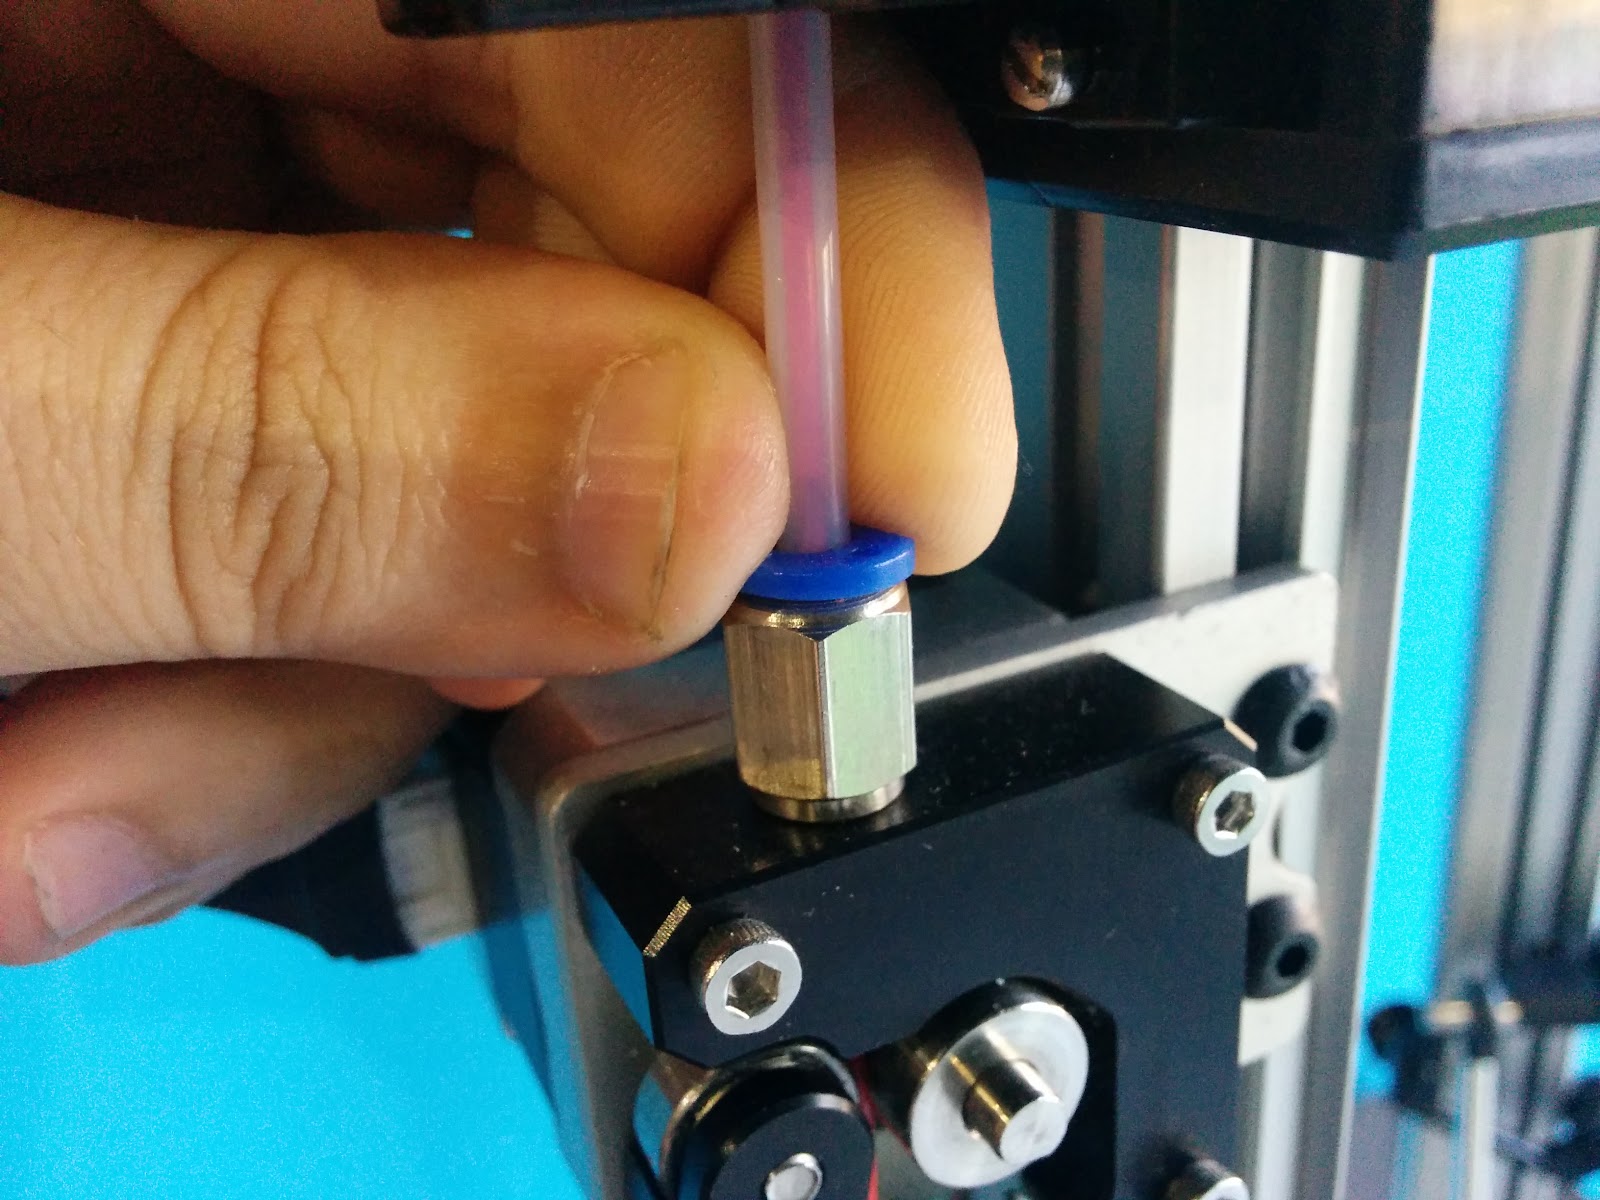
Push the blue ring around the filament guide tube near the print head and pull the tubing up to disconnect the filament guide tube. The bundle of wires that goes to the print head comes with a locking connector. Simply pull the wire up and disconnect the print head wire harness. Use the 2.5mm hex wrench to remove the two screws pictured. They are the screws that connect the print head to the end effector.
You can now remove the print head assembly.
DeltaMaker Print Head Removal (Old Style, Non-modular print head)
To remove the print head, you need to disconnect the filament guide tube from the filament drive mechanism on the back of the printer. This is done by pressing down on the blue ring and lifting the guide tube out of the fitting. If filament is loaded in your printer, please cut the filament below the where it enters the drive mechanism. If your printer has a colored clip on the fitting, the clip should be removed before pressing the blue ring.
Once the guide tube is removed from the filament feeder, you will need to use the small flat head screwdriver to remove the top and bottom screws from the end of the print head.
The top and bottom screws are special in that they are retained in the housing. They will not completely unscrew from the machine, so it is safe to loosen them all the way. Unplug the connector.
Use the 2.5mm hex wrench to remove the two screws pictured. They are the screws that connect the print head to the end effector. Leave the filament guide tube connected.
You can now remove the print head assembly.