Cold Pull Procedure to Unclog Nozzle

Begin this procedure with a cold print head, the motors turned-off, and the filament loaded.
First, disconnect the filament guide tube (white tubing) from the print head by pressing down on the blue ring, and pulling the guide tube up. The filament will stay in place, and the guide tube will slide up around it. The drive motor on the back of the machine will allow more filament to load as you pull.
Pull the guide tube up 8 to 10 inches, and cut the filament. You can leave the guide tube tucked out of the way for the rest of this procedure.
Next, turn on the DeltaMaker and open the web interface. On the temperature tab of OctoPrint, set the print head (hot end) to 230C.
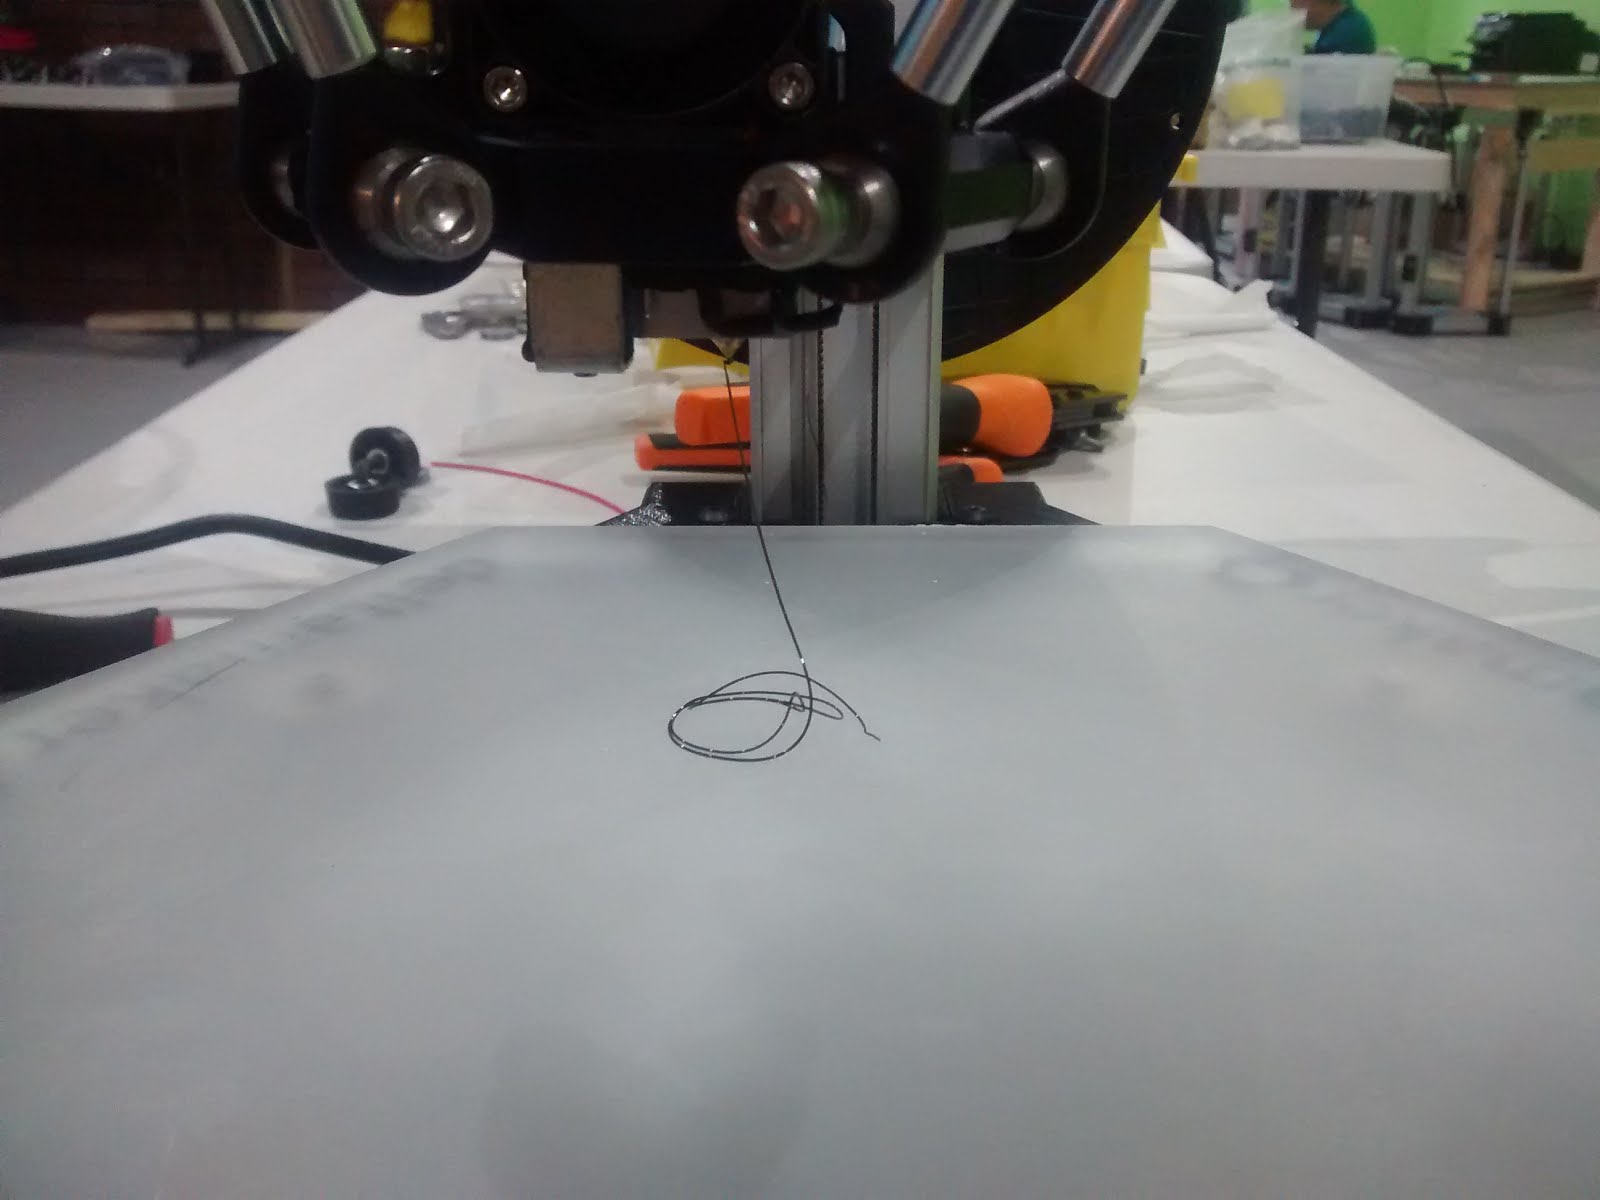
Once the print head is up to temperature, select the control tab in OctoPrint, and press the Home button. This will raise the print head and lock it in place, so that the nozzle will not be pushed downward during the next step. While being careful not to burn yourself, grasp the filament above the print head, and push it into the print head until you see some plastic coming out of the nozzle. You don’t need to push too much, just enough to ensure there are no breaks in the filament down to the tip of the nozzle.
Leave the extruded plastic hanging on the nozzle for now. Back on the temperature tab in OctoPrint, set the print head temperature to 100C. If there isn’t a dropdown selection for this, you’ll need to type “100” in, and press enter.
Keep an eye on the temperature as it cools down, and when it reaches about 140C or so, remove the extruded filament that’s hanging on the tip of the nozzle using a pair of metal tweezers or non-damaging tool of choice. Pulling the filament off the very tip helps ensure that everything inside in nozzle gets pulled out in the next step.
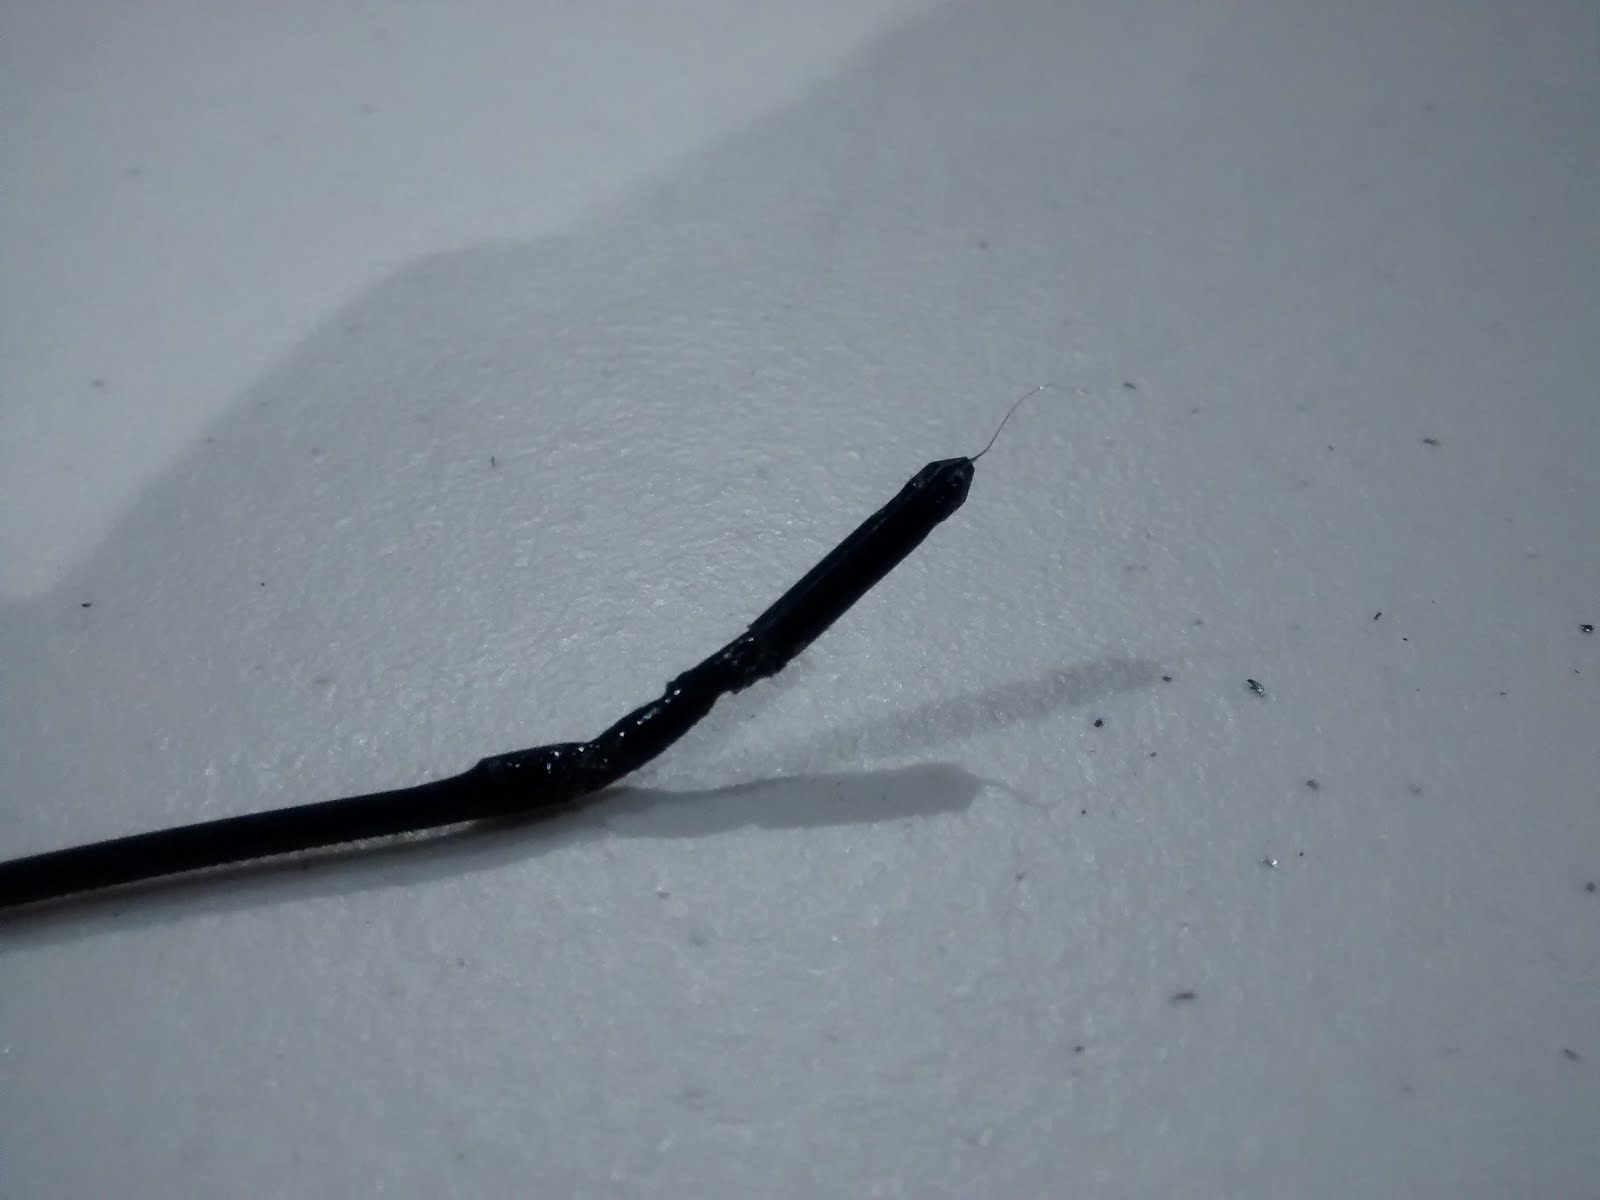
After cleaning the tip of the nozzle, the print head should be close to 100C. Once it stabilized at 100C, you should grasp the filament above the print head, and very slowly pull upwards. Continue to pull very slowly, and watch the filament as it emerges from the print head. If the filament appears to be stretching to the point of breaking, pull a little slower. Eventually, the filament will elongate all the way down the filament path.
If you’ve done this right, you may hear a POP as the filament releases from the inside of the nozzle. The end of filament should have the inner form of the nozzle (cone shape) and any debris will have come with it. If you don’t see this, repeat this entire procedure, and try pulling at a slower speed.
After you’ve cleaned the inside of the nozzle, reload your filament by reconnecting the filament guide tube to the top of the print head. Push a couple inches of filament through the extruder drive, until it reaches the inside of the nozzle.
This procedure is safe to do at any time on your DeltaMaker, and will ensure that debris and other contaminants do not accumulate inside the nozzle.