DeltaMaker SD Card Reflash Procedure
You'll need some things in order to complete this procedure:
2.5mm hex wrench
Micro SD Card Adapter to full sized SD or a Micro SD Card reader (If your machine has a Micro SD card)
Etcher: https://etcher.io/
DeltaMaker SD Image: https://www.dropbox.com/s/an0qpb5q9qy8os5/dm2-dev-20170525.img.zip?dl=1
You can leave the filament spool on your machine for this, or opt to unload the filament from the DeltaMaker.
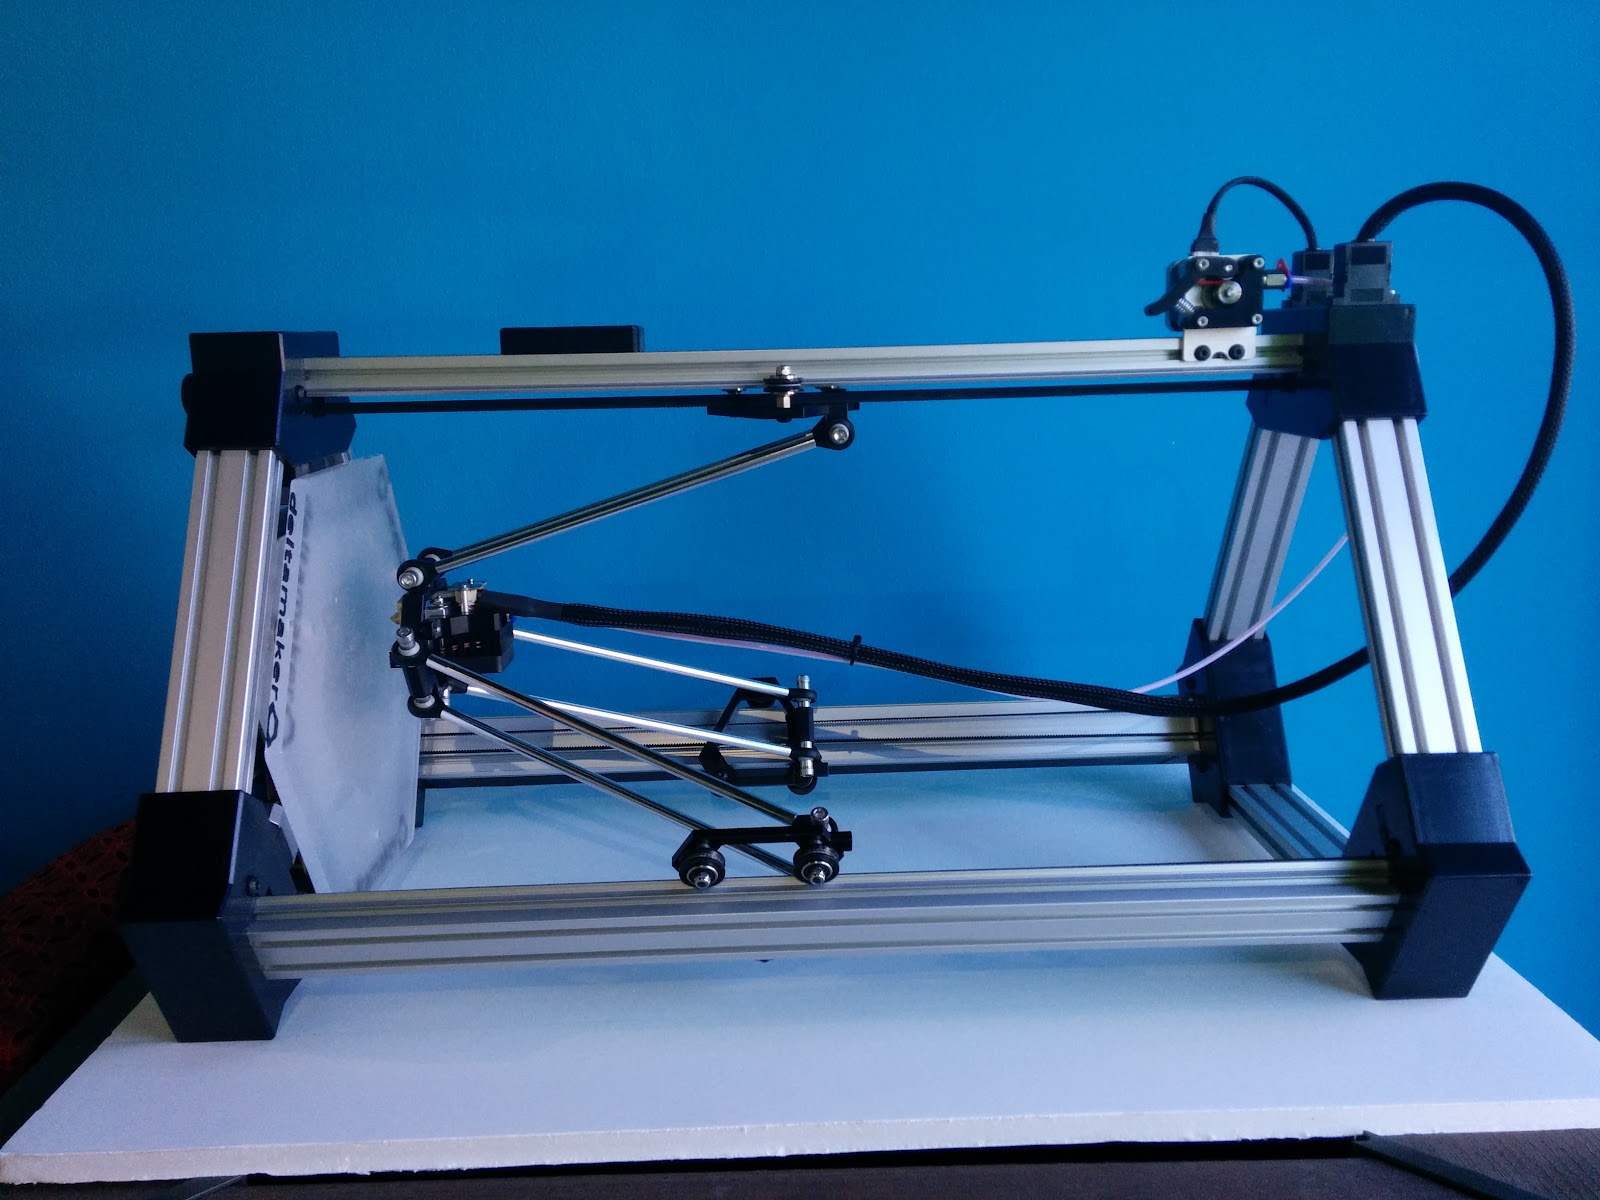
Disconnect the power and lay the DeltaMaker on its front face, with motor facing upwards, like pictured:
This is to keep from damaging the drive motor and power connector on the back.
On the bottom of the machine, there is a plate which needs to be removed to access the SD card which provides all the software needed to run the printer. Pictured are the three screws that need to be removed. Use the 2.5mm hex wrench to remove these:
Once the bottom plate has been removed from the machine, you will need to remove the black USB cable from the top right of the machine. This is the power cable for the Raspberry Pi that runs the DeltaMaker.
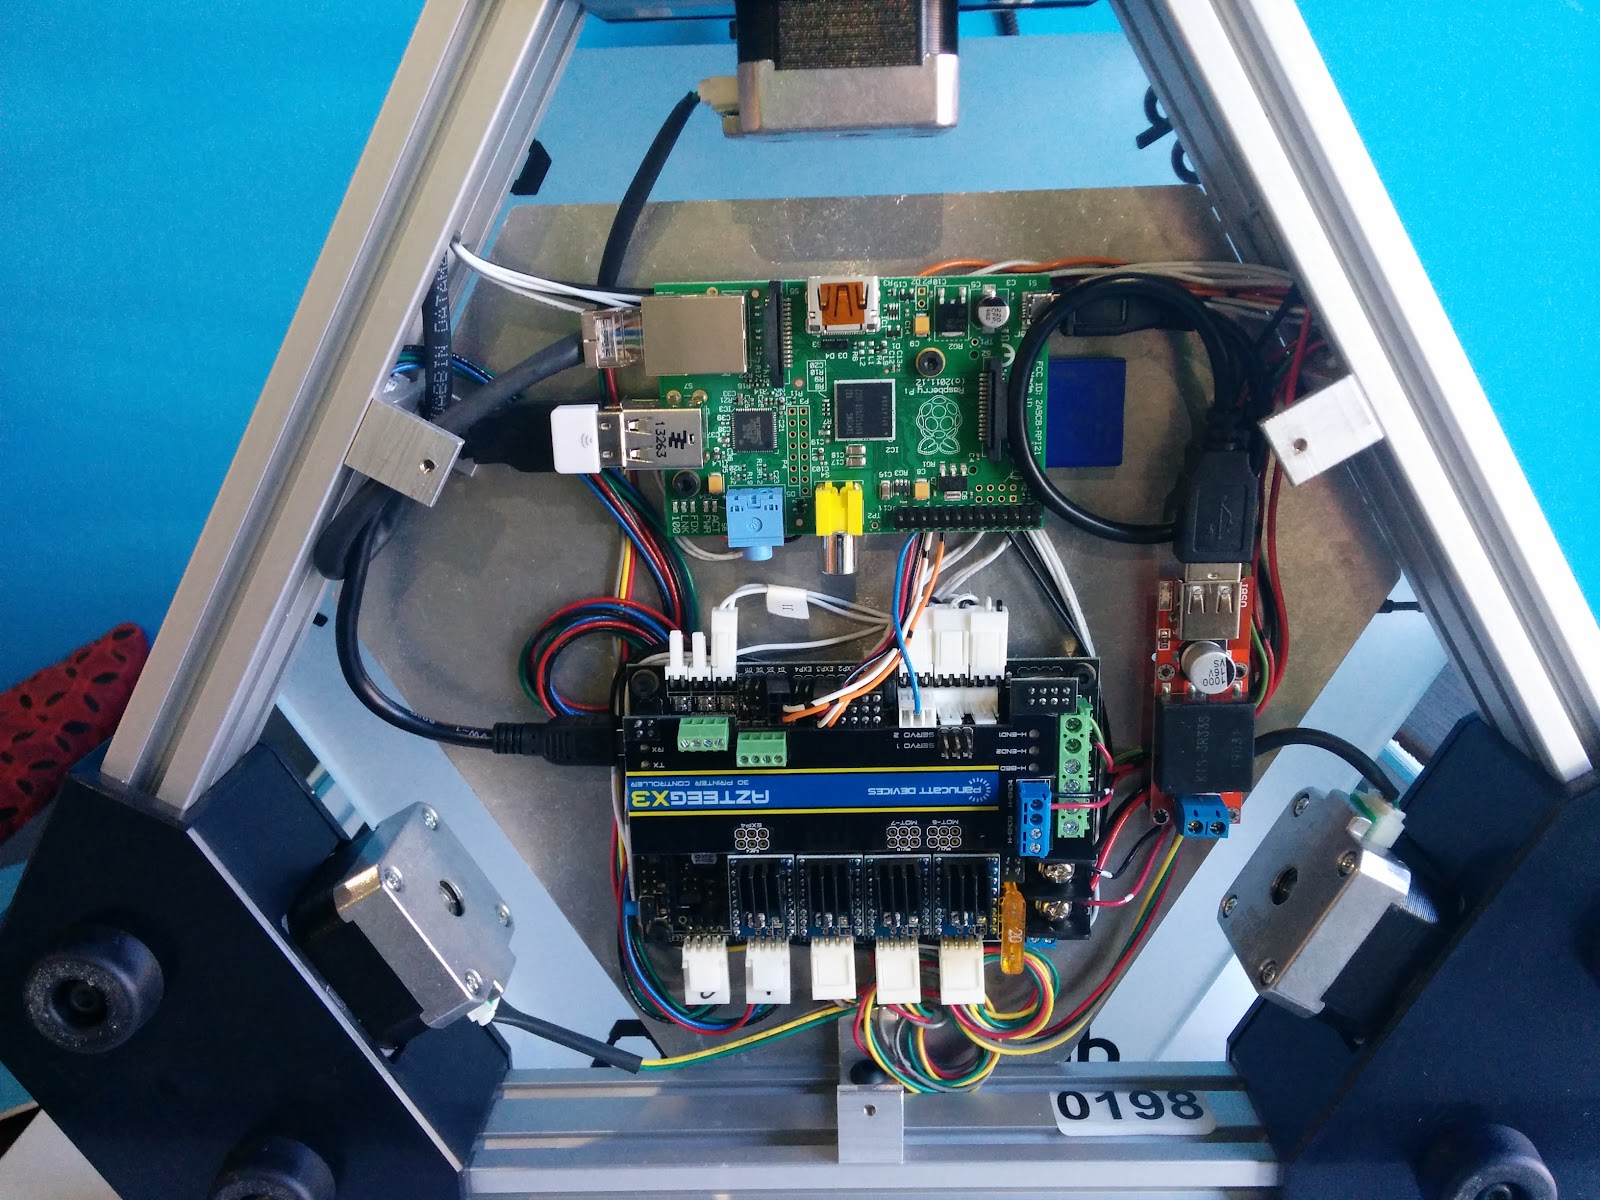
The SD card is plugged into the right side of the board should be removed and placed in a computer that is equipped with an SD card slot or SD card reader. Take note of the orientation so that it can be correctly reinstalled later. Also take note of the capacity of the card (4gb, 8gb, 16gb, etc)
Plug the SD Card from the DeltaMaker into a computer equipped with an SD Card reader. At this point, you should install Etcher.io and run the program.

On this window, click "Select Image", and find the system image file you downloaded earlier. It is okay if it is still a .zip file. Once you've done this, click "Select Drive" - you will want to ensure that you select the drive listed as "SD Card", and make sure that it matches the capacity of the card you removed from the DeltaMaker. This program can overwrite many types of drives, so be careful with your selection here. Etcher.io tries its best to ensure you do not select anything dangerous (like your computer's main drive).
**DOUBLE CHECK THAT THE CORRECT DRIVE LETTER IS SELECTED**
Click the “Flash” button. You may be prompted with a security warning at this time, as the program needs administrative access to be able to write the drive properly.

Once the SD card is finished writing, remove it from the computer, wait 2-3 seconds and reinsert it. This will refresh the file system and allow you to access the newly written files on the card.
When re-inserting the card, you may get warnings about needing to format the disk. Cancel out of them and do not let your operating system format the card any differently.
Open your file explorer and browse to the "Boot" drive that is now accessible. There is a "deltamaker.txt" file located within that drive. Edit it for the proper configuration of your machine, adding and removing # where applicable. You will need to use a proper text editor that can understand UNIX-style line endings. If the file looks like a jumbled mess, you'll need to open it in wordpad, sublime, notepad++, or something similar.
If you have issues editing this file, contact support@deltamaker.com and we will provide you a properly formatted file you can drop into place.
Once you have completed the configuration, reinstall the SD Card in the DeltaMaker.
The gold connectors should be facing upwards when reinstalling the SD card. Do not force the card into place, it should slide in firmly without too much resistance. The connector is on the underside of the Raspberry Pi. The illustration shows a large SD card, but this is the same for the micro SD cards as well (TN1006 MicroSD Card Installation Procedure).
Reconnect the USB cable to the red power supply and to the USB connector marked “Power” on the Raspberry Pi.
Reassemble the bottom plate, reconnect the power to your DeltaMaker, and turn it on. The DeltaMaker has to go through a procedure where it automatically expands the filesystem to give you the most usable space. Wait 2-4 minutes before trying to log onto the DeltaMaker. The machine should auto-home when booting up on this image. If your serial number is less than 0150, your connection information may have changed -- contact support@deltamaker.com if the default username/password combo does not work for the WiFi or OctoPrint.
The new connection information for this address is as follows:
Web address: http://deltamaker-0123.local/ (where 0123 is the serial number of your machine, which is set in the deltamaker.txt file on the SD card)
Web address (direct IP): http://192.168.10.1 (this is only reachable while connected to the wifi access point)